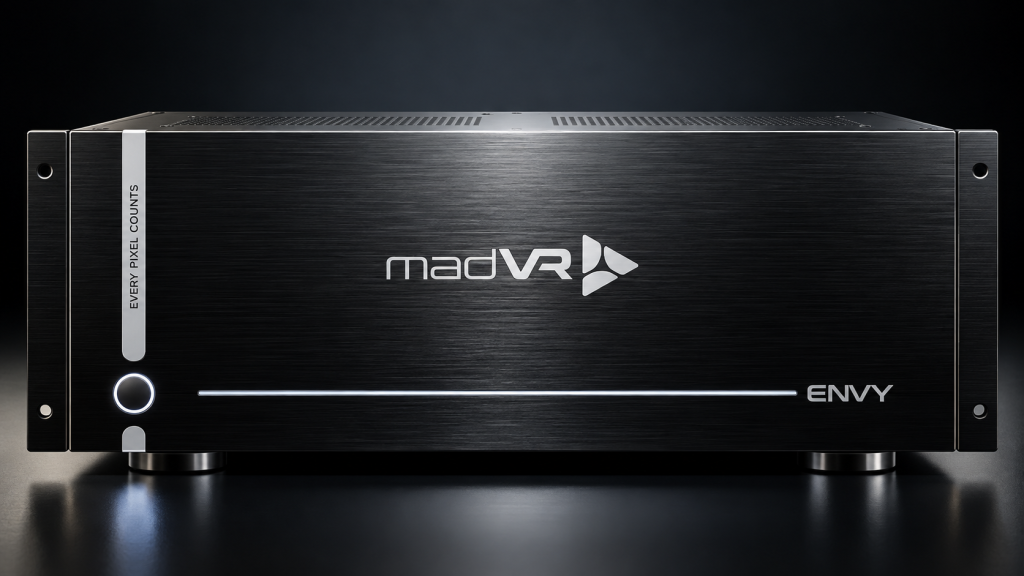


Ideally, a video processor will take your source picture and make it better. It scales better, handles HDR, fixes picture problems, and enables your display to output a better result. But what if you had a processor that did more than those standard tasks? Introducing the MadVR Envy. MadVR builds upon the expected responsibilities of a video processor and goes above and beyond, adding a level of control and image management that few products can match. This guide consolidates the entire Envy lineup and breaks down what each product offers, how the configurations vary, and what features really matter.
Why would you need a dedicated video processor if your projector or AVR already processes video?
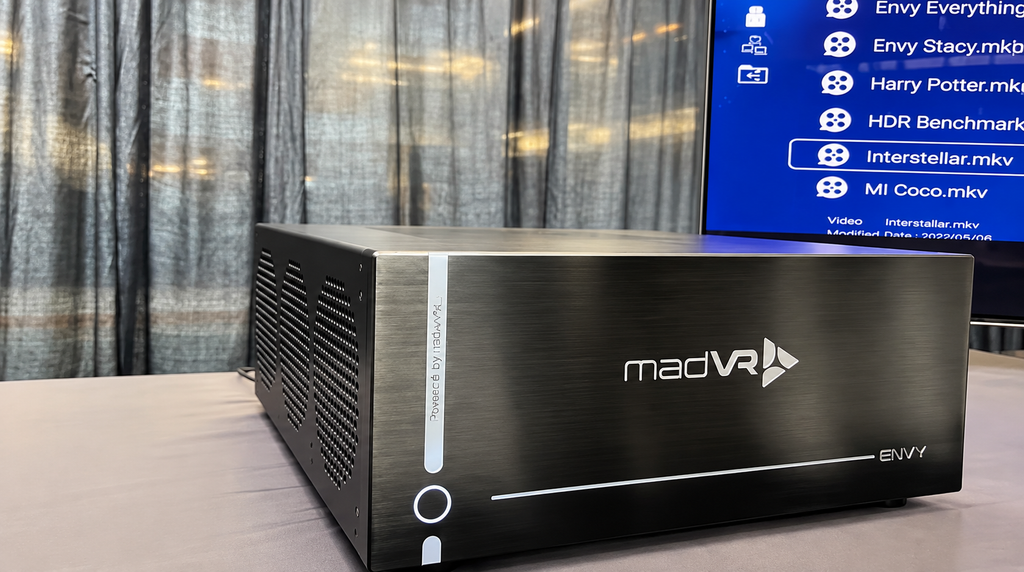
You might not need a separate video processor if your AVR/projector is already providing your theater with the level of picture quality and control you desire. After all, video processing occurs long before the picture reaches your screen. In a typical home theater, the signal chain might look like this:
Source → AVR/pre-pro → Envy → projector/display.
The MadVR Envy adds another stage, but its purpose is specialization. It consolidates multiple advanced video-processing functions into a dedicated interface. This reduces the need to rely solely on the processing controls built into the source, AVR, or display.
These controls can come in handy when your system needs assistance with HDR range mapping, changing screens/aspects ratios, scaling, image reconstruction, artifacts and noise reduction, motion smoothing, calibration targets, or other configuration options. HDR support on your display might be limited, causing bright highlights and subtle shadow detail to be lost due to the inability to adjust brightness properly. Or maybe you have a multi-screen setup with scopes that require more sophisticated control over edge blending, subtitle positioning, and zooming during aspect-ratio switches.
MadVR Envy brings these specialized tasks into a dedicated processing stage, helping improve how the final image is managed. HDR is the most obvious example, since so much content contains a brighter brightness range than today’s projectors can output. Effective tone mapping has become critical for preserving HDR details and contrast.
Why Is the MadVR Envy’s HDR Dynamic Tone Mapping Such a Big Deal?

HDR films and shows are often created with peak brightness levels ranging from 1,000 to 4000 nits. Tone mapping makes up for that difference by compressing HDR’s brightness into what the projector can reproduce. Ideally, without losing highlight detail, contrast, color fidelity, or shadow detail.
The Envy performs frame-by-frame 4K HDR dynamic tone mapping. It analyzes every single frame as it comes in, and intelligently modifies the image based on the source content and your configured display brightness range. You configure the Envy for the characteristics and brightness capabilities of your display, allowing it to optimize the HDR signal for your setup.
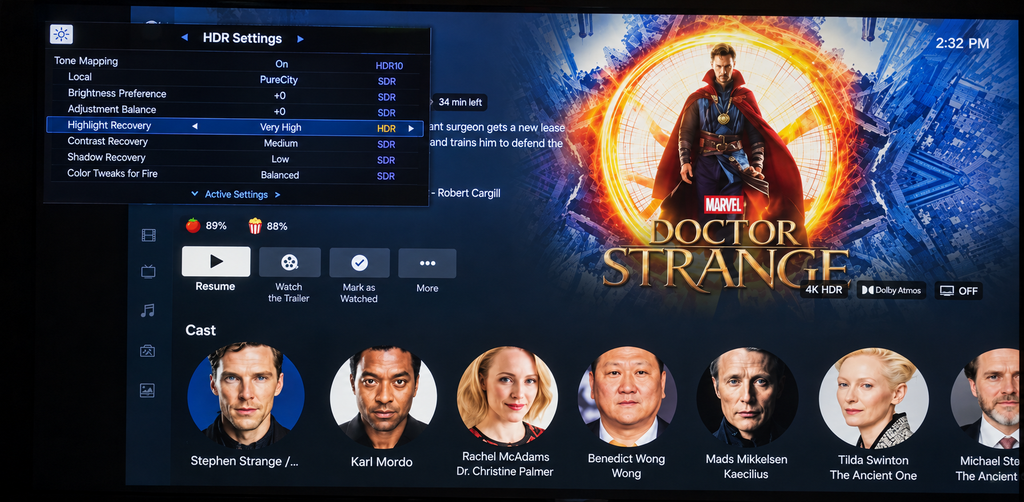
You can even fine-tune how it does that with its various tone mapping controls. There are HDR “Looks” that provide quick preset options for overall presentation. Highlight and Global Saturation sliders control the intensity of colors. Contrast Recovery uses HDR’s histogram data to enhance overall contrast. Highlight Recovery helps retain detail in bright areas of the picture. Shadow Detail Recovery ensures detail isn’t lost in dark areas either.
HDR Highlight Recovery can help keep detail in bright skies, reflections, and light-hitting objects. Shadow Detail can help keep texture in dark clothing, shadows inside buildings, and nighttime scenes. Contrast Recovery can help keep bright and dark areas of the screen from bleeding together. Combined, these adjustments help keep your HDR content from looking flat, washed out, or too dark.
HDR Dynamic Tone Mapping is included across the current Envy configurations. The current lineup includes the Core MK1, Core MK1 w/ Premium Pack, and Core MK2 8K RDY 48G. It also includes the Core MK2 w/ Premium Pack, Pro MK3 8K 48G, and Extreme MK3 8K 48G. All six configurations support frame-by-frame 4K HDR dynamic tone mapping.
How Does the MadVR Envy Manage Different Aspect Ratios Without Constantly Changing the Projector Lens?
Scope screens have wider formats like 2.35:1, 2.37:1. and 2.40:1. But home theater content may have multiple aspect ratios within the same program. A fixed lens position will have 16: 9 sources bleeding off the edges of the screen. Lens memory corrects this by adjusting the projector’s zoom lens position, but moving the lens causes playback interruption.
The Envy can eliminate the need for frequent projector lens adjustments by using digital processing to resize and position the image. Aspect ratio detection triggers resizing, shifting, stretching, or cropping of the image to match the screen setup. The following features work together to manage these changes while keeping the presentation properly framed.
Constant-Image-Height Configuration and Screen Boundaries
A constant image height setup allows you to maintain one fixed height for your image on your screen regardless of the aspect ratio being displayed. In most cases, you’ll have to physically move your projector lens or adjust its zoom position when going back and forth between widescreen content and 16:9. With the Envy, digital processing can resize and position the image, reducing or eliminating projector lens adjustments between common aspect ratios.
To make this possible, the Envy allows you to create custom screen boundaries. Under the Screen Configuration Menu, you’ll be able to choose Custom and then define the usable edges of your screen: top, bottom, left, and right. The Envy will remember these boundaries and use them to properly resize and position every image that is displayed.
After you go through the calibration process, you can watch 16:9 movies and TV shows, play games, view menus, and enjoy widescreen content without having any part of the image fall onto the masking, walls, ceiling, or floor. Subtitles and menus will also stay visible with these boundaries in place.
Automatic Aspect-Ratio and Black-Bar Detection
Aspect-ratio detection allows the Envy to recognize changes in image shape. It can occur when watching content shot in widescreen, 16:9, or IMAX framing. Black-bar detection is used to determine where those changes happen. The Envy can then automatically apply proper image treatment. There is no need to switch modes again once the content changes.
Films that use multiple aspect ratios benefit the most. Interstellar uses several different framings throughout the movie. Some of these changes occur a few moments apart from each other. The Envy detects the change and can automatically digitally resize or reposition the image to fit your configured screen limits.
Because detection occurs within the Envy, it works with many source devices, including Blu-ray players, streaming devices, game consoles, and media servers. The source device will not require its own built-in aspect-ratio detection system.
CIW Image Shift
CIW stands for constant image width. It works great with 16: 9 screens when you want to maintain the picture at a constant width and control the position of the unused black-bar space.
Typically, when viewing widescreen content on a 16: 9 screen, black bars will display above and below the active picture area. Envy’s CIW image- shift feature allows the installer to move that excess blank space up or down the screen depending on the installation and desired viewing preference.
This allows the installer to finely adjust the vertical position of the image without having to stretch the picture, move the projector, or adjust the lens position.
Non-Linear Stretch
Non-linear stretch helps the Envy take better advantage of a screen when watching content with a non-matching aspect ratio. For example, when displaying content with a narrower aspect ratio on a wide screen, black bars may appear on the sides. Rather than stretch the entire picture uniformly, the Envy adjusts how much it enlarges different parts of the image.
The center is stretched less, and the outer portions are stretched more. This allows subjects primarily located in the center of the screen (like faces, people, and cars) to maintain more natural proportions.
However, the result isn’t entirely free of distortion either. Subjects near the edges of the screen may look slightly wider, and there can be some cropping depending on what settings are chosen. However, distortion is less obvious using the Envy’s method than with traditional uniform stretching.
Non-linear stretch can be applied both ways as well. While displaying something on a scope screen, it can help minimize the side bars if the content is narrower than 21:9. When watching something on a 16: 9 screen, it can help minimize the top and bottom bars if the content is wider than 16:9.
AI Anamorphic Stretch
AI anamorphic stretch can digitally transform widescreen content for use with certain scope-screen and anamorphic-lens configurations.
Rather than stretching the entire image uniformly, anamorphic stretch is applied selectively. Done properly, this can allow the image to fill more of the screen width without appearing as distorted.
Actual results will vary depending on your screen format, projector, lens, and installation. AI anamorphic stretch is not a substitute for proper optical alignment. Instead, it simply provides the Envy with an additional method to properly fill a wide-screen layout with differing aspect ratios.
Small Black Bar Reduction
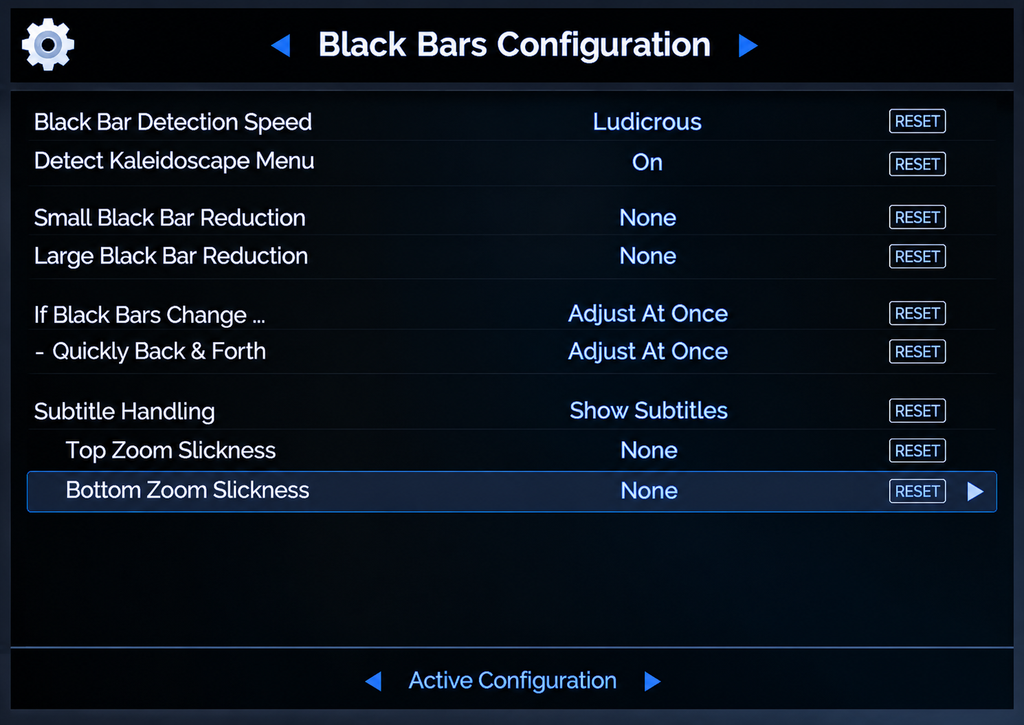
Sometimes a movie’s aspect ratio doesn’t exactly match your screen’s ratio. When this happens, you can still get thin black bars at the sides of the picture even if your projector and screen are properly set up.
Think of 2.35:1 content that doesn’t quite fill a 2.37:1 or 2.40:1 screen. The Envy can help eliminate those skinny side bars by making slight adjustments to the picture, instead of using the “full stretch” method needed for larger format conversions.
You can adjust this setting to 100% to encourage the Envy to fill these small gaps. However, please note that this setting is not designed to force every picture to fill your screen. There is a big difference between removing a small amount of excess room from 2.35:1 content and seriously stretching a 16:9 picture to fill a wide screen.
Subtitle and On-screen Display Management
Subtitle text can vanish if it’s outside the picture. Certain widescreen films render subtitles in the lower black-bar area. Removing that area cuts off the subtitles. Pause bars, volume meters, and chapter menus can disappear too.
Envy adds that missing area back when subtitles or other elements appear on screen. It temporarily adds the needed black-bar space to the bottom or top of the image. Once the element goes away, the image will show normally again.
Subtitles might flash on and off multiple times during dialogue. This makes the image flicker in and out too much. Envy’s subtitle delay lets you set a short wait time before the restored area disappears.
Envy offers two subtitle options. Subtitle Management resizes the image to create room for subtitles. Dynamic Subtitle Overlay repositions and dims subtitles without resizing. It is available on the Core MK1 w/ Premium Pack and Core MK2 w/ Premium Pack. It is also available on the Pro MK3 8K 48G and Extreme MK3 8K 48G.
Geometry Correction
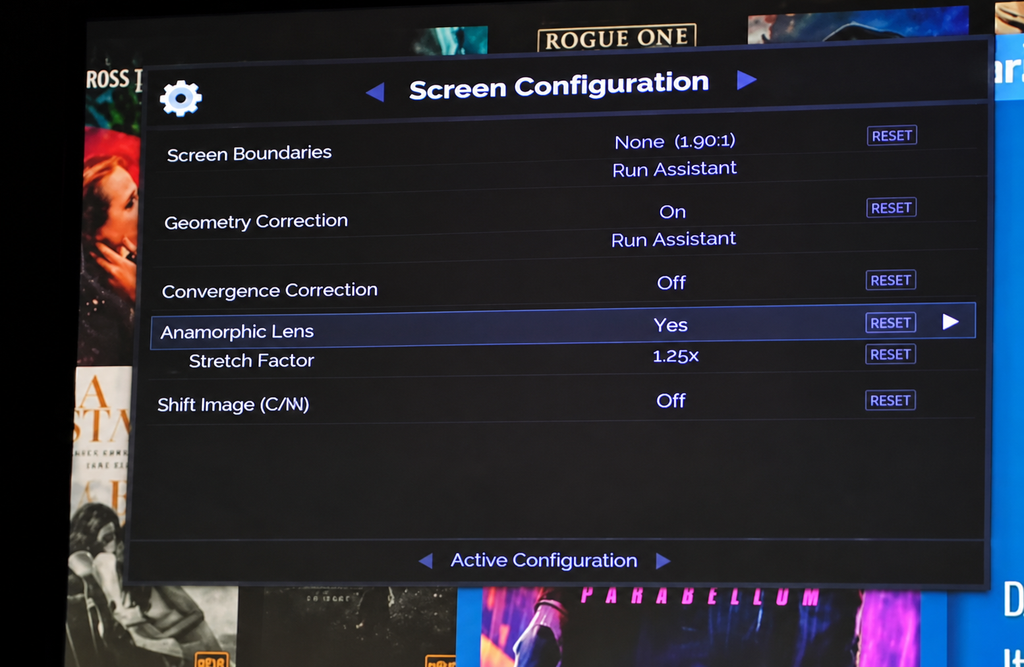
Sometimes projector alignment alone cannot perfectly square an image onscreen. Barrel or pincushion distortion is introduced by anamorphic lenses, causing vertical and horizontal lines to curve outward or inward like the shape of a barrel or cushion. Screens that are curved or placed off-axis, and other installation factors, can also create geometry issues.
Geometry Correction gives the Envy the ability to digitally stretch and skew the image so that it better fits the screen. Working with a grid of user-adjustable anchor points on the Extreme MK3 allows the installer to correct different portions of the frame rather than applying a single setting to the whole image.
This provides additional correction options when optical alignment or projector position cannot completely fix the image. Geometry Correction does not replace proper installation technique, but can help correct residual distortion and improve image-to-screen fit.
How Does the MadVR Envy Improve Lower-Resolution, Compressed, or Imperfect Video?
Flaws in lower-resolution footage become far more apparent when viewed on a large 4K projector. Blurry or soft pictures can look even softer. Compressed video streams can show blockiness, ringing artifacts around objects, or banding in gradients like skies and shadows.
That’s where MadVR Envy’s processing shines. Its job isn’t to make every movie look fake or overly processed. Instead, MadVR scales the image using high-quality algorithms and provides individual tools that target specific problems. This way, the picture can be enhanced without applying the same settings to everything you watch.
The upscaling engine provides chroma upscaling designed to minimize ringing and other visible artifacts. Premium Core models, the Pro MK3 and Extreme MK3, also support upscaling to even higher resolutions, including 5K at 24, 50, or 60 frames per second, 8K at 24 or 60 frames per second, and custom resolutions up to 8K60.
Other controls address specific image issues. Sharpening and edge enhancement both improve subjective sharpness, but act on different levels of image structure. Texture-detail enhancement affects finer levels of picture structure. AI compression-artifact reduction is designed to reduce artifacts caused by heavily compressed video. AI grain and noise reduction improves control of unwanted noise. Banding/ringing reduction can reduce visible banding and ringing artifacts. DeintAI also performs video-mode deinterlacing on Blu-rays and broadcast television.
What Is MotionAI, and Why Is It Different from Ordinary Motion Processing?
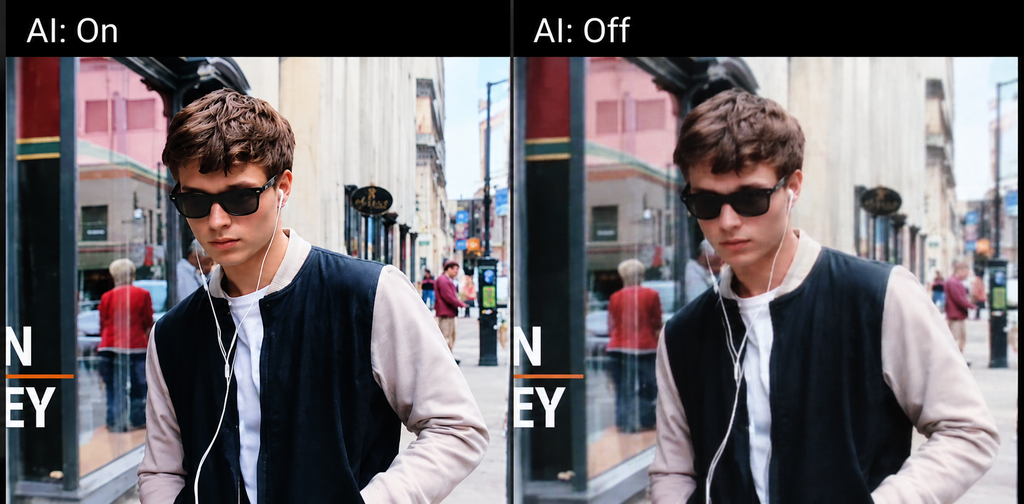
Movies are typically shot at 24 frames per second. While that gives video its cinematic look, it also leads to judder during slow camera pans. Think of someone lazily panning across a city skyline or following a car driving down the street. The motion might look slightly choppy rather than butter smooth. Judder is even more noticeable when you’re watching that footage blown up on a big screen.
Ordinary motion processing tries to eliminate this judder by inserting frames between existing ones. The processor analyzes how objects move from frame to frame, then produces new frames in between to make the action look smoother. Smooth Motion is available on all six current Envy configurations. It is designed for displays with poor or no 24 FPS support. MotionAI works differently. It is exclusive to the Extreme MK3 8K 48G and uses per-pixel AI motion interpolation.
Rather than analyzing how the whole image moves, it looks at how individual parts of a frame move. This helps it respond more precisely when different parts of a scene move at different speeds. You can see the difference in action in this MotionAI demonstration video.
Which MadVR Envy Models Can Handle 4K120, 8K, and VRR?
The Envy lineup is not separated by HDMI 2.1 branding alone. The difference between each model is what they are capable of receiving, processing, and sending to the display. The six Envy configurations support different combinations of high-resolution and high-refresh-rate signals.
VRR is important for gaming because it allows the display to dynamically change its refresh rate as the frame rate of a game changes. So, if your game is fluctuating between 70 and 95 fps, your display can react to that instead of being locked at 60Hz or 120Hz. That means less tearing and strobing.
The Core MK2 w/ Premium Pack, Pro MK3 8K 48G, and Extreme MK3 8K 48G support Input VRR from 1 Hz to infinite Hz. These models support Output VRR at 120 Hz, 240 Hz, and 360 Hz, as does the Core MK1 w/ Premium Pack.
Let’s touch on the Core MK2 a little closer. The internals have hardware that supports the HDMI 2.1 spec of 48Gbps; however, if you buy the standard version without the Core MK2 Premium Pack, it defaults to HDMI 2.0 output at 18Gbps. Purchasing and installing the Core MK2 Premium Pack adds supported HDMI 2.1 features, including 8K output, Input VRR, and QMS/QFT support.
Both the Pro MK3 and Extreme MK3 support 8K output at 60Hz 4:4:4 as well. With 8K referring to the resolution, 60 referring to the refresh rate (refreshes per second), and 4:4:4 refers to a signal format without chroma subsampling, preserving full chroma resolution. QMS can reduce or eliminate the black-screen delay associated with compatible refresh-rate changes. QFT pushes frames through the connection quicker than usual. DSC uses visually lossless display-stream compression to reduce the bandwidth required for high-resolution, high-refresh-rate signals.
How much control can you really have over the Envy?
Sure, you know the Envy can customize tone, brightness, color, subtitles, and dynamic tone mapping. But how finely can you control those adjustments? The Envy’s calibration system does much more than let you slide around a few picture buttons. Supporting a professional-grade 256³ 3D LUT, 4,096-point 1D LUT, and featuring 12-bit precision, the Envy can finely tune the relationship between color, brightness, and tone throughout your image.
A 3D LUT manages adjustments across combinations of red, green, and blue color values. A 1D LUT deals with subtleties in individual channels and brightness levels. Instead of broadly adjusting your entire image, calibrators have a much wider range of values to apply precise corrections. Calman and ColourSpace are also supported by the Envy calibration engine V2, allowing you to create and import detailed calibration data to the processor.
Being able to make detailed adjustments would get overwhelming if you had to rebuild those adjustments every time you sat down to watch a movie. Profiles make that problem go away by allowing you to save related settings in groups. One source could have customized subtitle behavior, while a different projector could use a unique display profile. Individual DTM “Looks” can be saved to compare fine corrections. The Core MK1 and standard Core MK2 can store up to 50 Profiles. The more advanced Premium, Pro MK3, and Extreme MK3 can store an unlimited number of Profiles.
The Envy separates tweaks from your master settings too. Make an adjustment, load up a favorite scene, and either save your change or revert back to your original setup. The higher-end models include advanced features like 3D Luminance Boost, Desired SDR Luminance, SmartMenus, built-in control of your AV gear, and many more advanced test patterns.
What does the MadVR Envy setup process look like?
The basic installation is straightforward, but advanced features and calibration require more detailed configuration. Connect your AVR/pre-pro to the Envy’s input, then connect the Envy’s output to your projector or TV. A network connection handles control, updates, and remote assistance. You can often add the MadVR Envy to an existing theater without redesigning the system. Installation depends on your signal chain and equipment.
Advanced features are optional. Start with primary controls and leave the advanced settings alone until you’re ready to use them. Even the menu system is designed to make that easier. Get explanations of what each setting does through context-sensitive help as you navigate through menus. Descriptions of each menu and setting are built in to help you learn the basics of what each control will affect. There’s no need to look up every detail before experimenting with a feature.
Speaking of experimenting, that’s simple too. Make a change to see how you like it. If it doesn’t look or work how you want, reset it. MadVR Envy’s setup doesn’t force you to keep every change you make. Test out settings to learn exactly what they do.
You can integrate Envy’s remote control and automation with IP-based platforms such as Crestron, Crestron Home, Control4, Savant, and RTI. Profiles can automatically choose the correct Envy configuration when switching sources. After setup, MadVR Envy can integrate into your theater’s control system instead of another device you have to manage.
Conclusion
The Envy provides video-processing tools for HDR tone mapping, screen geometry, subtitle management, upscaling, artifact reduction, motion processing, calibration, and input management. Each tool addresses a different aspect of the image, and you can combine them when appropriate.
Each model offers something different than the next. There are some similarities between each model as well. Certain features are exclusively available on their premium model, the Pro MK3, or the Extreme. Each configuration offers a different combination of features, performance, and connectivity options.
If you are unsure which configuration fits your setup, Dreamedia can help you work through the options. You can schedule a consultation with Dreamedia to discuss your theater, explain what you want the video processor to handle, and help you find a model that makes sense for your system.
FAQ
Do all MadVR Envy models support the same HDR Dynamic Tone Mapping?
HDR Dynamic Tone Mapping is included across all six current Envy configurations.
Will the Envy be able to accommodate different aspect ratios?
Yes. The Envy automatically detects and manages different aspect ratios. It works particularly well in Constant Image Height theaters, reducing projector lens adjustments.
Does the Core MK2 have full HDMI 2.1 capability without the Premium Pack?
No. The standard Core MK2 lacks the full HDMI 2.1 feature set available with the Premium Pack. The Premium Pack adds the supported HDMI features available with the upgraded configuration.
What’s the difference between Subtitle Management and Dynamic Subtitle Overlay?
Subtitle Management resizes the image to create room for subtitles. Dynamic Subtitle Overlay places subtitles within the active image area without resizing it.
Why does the Extreme MK3 have Geometry Correction?
Geometry Correction helps reduce residual geometric distortion from anamorphic lenses, curved screens, off-axis installations, and other geometry limitations.